Installing and configuring the DotNetNuke forum module is something that although in its roots is a simple process can be a bit tricky and confusing for individuals. This article will walk you through the process for basic installation and configuration of the forum module. This article is based on using the 4.4.3 version of the forum module, at the time of writing this is the most current version.
Installation
The process to install the forum module might be slightly different for individuals depending on how they installed DotNetNuke and which version they started with.
Option A – Available Modules
If you are running on a version of DotNetNuke that was released AFTER the 4.4.3 version of the forums was released you should have the forum module available in your “Available Modules” section of the module definition page. To see if you have the proper version prepared for installation simply follow the below steps.
- Login as your host users
- Select “Module Definitions” from the “host” menu
- Under the Available Modules section you should see “Forum (4.4.3)” similar to the following
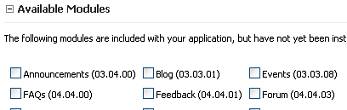
- Check the box next to “Forum (04.04.03)”
- Click “Install Selected Modules”
- After a few moments you will be returned to the “Module Definitions” page and you should see the Forum module listed.
If you DotNetNuke installation does not have the Forum module available or does not have the proper version of the module available in the “Available Modules” section please follow the instructions in “Option B” below, otherwise skip to the “Configuration” section.
Option B – Standard Installation
If your portal did not already have the Forum module available for you or you didn’t have the proper version you may also setup the module using the standard DotNetNuke installation procedure. You can obtain the installation package for the module via the “Forum Project” page on the DotNetNuke website, once you have saved this package, simply follow the below steps to install the module.
1. Login as your host user
2. Select “Module Definitions” from the “Host” menu
3. Select the “Install New Module” option from the action menu
4. Use the “Browse” button to find the downloaded install package
5. Click “Install New Module” to start the install process.
6. After a few moments you will see the standard output from the module install process, ensure no errors are listed and that it says success at the bottom.
Configuration
The first part of the configuration of the forum module is very simple. I started by creating a new page that is available for all users called “Forum”, and then I added the forum module to my content pane using the standard DotNetNuke administration practices. This resulted in a view similar to the following.
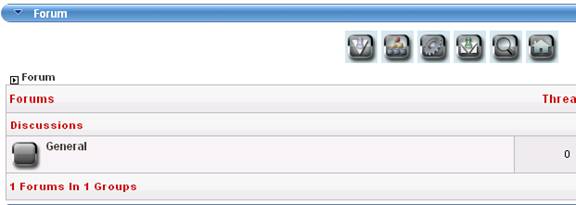
To start things off I will explain what the six icons at the top of the page are used for.
 |
Moderate – Using this link you can access the moderation queue for your forum |
 |
Admin – Using this link you can access the administration options of the forum, we will discuss these in a few moments |
 |
My Settings – Using this link you can access your personal settings including e-mail notifications and signatures; this is available to all users |
 |
My Posts – Using this link you can access all posts that you have created; this is available to all users |
 |
Search – Using this link you can access the search functionality of the forum; this is available to all users. |
 |
Forum Home – Using this link you can quickly get back to your forum home page. |
By default the forum is created with one group “Discussions” and one forum “General” to modify the default forum configuration we will use the “Admin” link to access the forum administration, this will take you to the following page, we will discuss the basics of each section below.
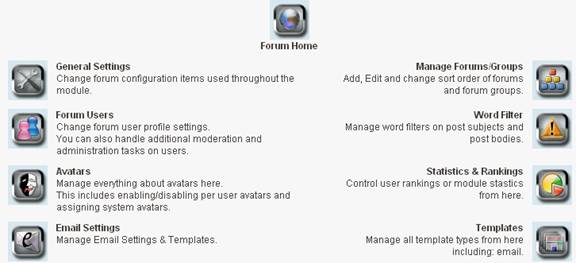
General Settings
This section of administration is where you can set items that apply to the entire forum. Items of importance that you might want to modify from defaults are the “Allow HTML Posting”, by default this is enabled and users are provided with the Rich-Text editor if you want to only allow plain-text posting you need to set this option. Other items of consideration include the users ability to create signatures and the total number of threads per page.
There are no mission critical settings in this section that must be modified to successfully configure the module.
Forum Users
This section in the beginning has no function as it is your method to find and edit users that have been accessing the forum.
Avatars
This section allows you to enable/disable user avatars, by default user avatars are enabled and no changes to this section are needed
Email Settings
This section allows you to enable/disable e-mail notifications for your users. Additionally you can configure the from address for all notification e-mails. You need to enter this configuration page and change the from address and display name to ensure that they are proper e-mail addresses. The following is a capture of the default form display.
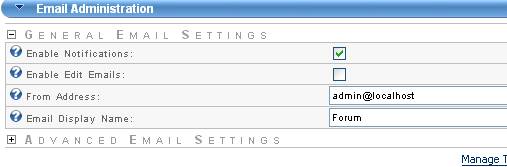
As a more advanced option you may use the “Manage Templates” link to modify the various e-mail templates that are set to users.
Manage Forums/Groups
This is a very important section of the forum configuration as this is where you configure the posting permissions. Since this is a basic configuration article we will not discuss the details of making major additions and changes to this section, but will simply walk you through the needed steps to allow all registered users to post to your forum. When you first visit this section you will see the following:

Click the plus sign to expand the discussions node, you can now click “edit” next to your General group. If you expand the General Settings section here you will see the following:

Right here is where you can enable and disable moderation for the forum, simply select the proper “Forum Behavior” for your needs. At this time ignore the additional items at the bottom of the screen and hit update.
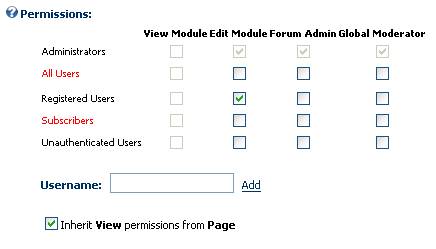
Now that this has been configured we must set the permissions to allow users to post threads. This is done via the module settings so click “Forum Home” to return to the homepage, then select “settings” from the action menu. You should see the standard permissions grid with a few additional columns, all users with posting rights should have “edit” permissions to the module as in the below screen capture. Please note that this will NOT give them extra permissions that are un needed.
This completes the configuration items needed to allow registered users to post to the forum.
Word Filter
This area allows you to edit the word filter that is used to automatically replace items posted by users.
Statistics
In this area you can configure post statistics and users rankings.
Templates
In this area you can manage all templates for the display and usage of the forum module. All concepts are beyond the scope of this article.
Conclusion
After following the steps listed above you should now have a very simple forum setup and ready for users to start adding content! Please look for future articles that will discuss more advanced features of the forum such as administering additional forums and using the word filter.