DotNetNuke AJAX Sample Module
DotNetNuke w/ AJAX Toolkit
Author: Chad Nash/Friday, September 27, 2013/Categories: Uncategorized
|
In our first article we discussed ASP.NET Ajax and provided an overview outlining the features and the supported methods within DotNetNuke. In this second article we will walk through the process of creating a very simple demonstration module that utilizes some of these new techniques. Before you continue with the tutorial outlined in this article you will need to have an installation of DotNetNuke (4.5.0 or later) as well as the Starter Kit Visual Studio templates installed. Both of these items can be obtained from the DotNetNuke website (http://www.dotnetnuke.com). In addition to this you will need to download the ASP.NET AJAX framework and Control toolkit, these items are available for download from http://ajax.asp.net To create our demonstration module we be creating a “Dynamic Module” that will automatically be compiled by ASP.NET as part of the entire DNN solution. To accomplish this we will start by opening our DNN Solution in Visual Studio, then follow the below steps.
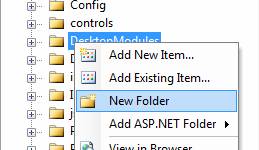
- Create a new folder under the “DesktopModules” folder of your DNN solution. Name this “DemoApp”
-
- Now, right click on the “DemoApp” folder and select “Add New Item”
- The following dialog will appear
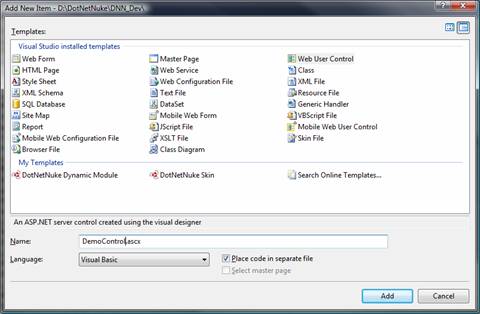 \ \
- Select “Web User Control” for the template and “DemoControl.ascx” for the name
- Switch to Code View and change the following line from
 <v:path o:extrusionok="f" gradientshapeok="t" o:connecttype="rect"><o:lock v:ext="edit" aspectratio="t"> <v:path o:extrusionok="f" gradientshapeok="t" o:connecttype="rect"><o:lock v:ext="edit" aspectratio="t">
to
 <v:path o:extrusionok="f" gradientshapeok="t" o:connecttype="rect"><o:lock v:ext="edit" aspectratio="t"> <v:path o:extrusionok="f" gradientshapeok="t" o:connecttype="rect"><o:lock v:ext="edit" aspectratio="t">
This ensures that our module implements all needed interfaces to interact with DotNetNuke
- In the Source view of our control we will now create the first portion of the presentation code. We start by adding a simple panel control with 1 label and two buttons

Please see listing 1.txt for this code if you would like to copy-paste
- In the code view we need to add code on page load to successfully register the Ajax components if Ajax is installed with the version of DotNetNuke.
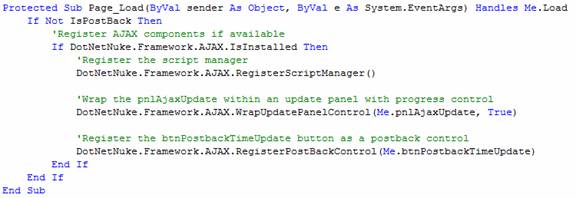
In this sample we simply check to see if Ajax is installed, if it is we register the script manager as that is required for all Ajax interaction. We then wrap our pnlAjaxUpdate control within an Update Panel using the “WrapUpdatePanelControl” method provided by DotNetNuke. The last item is to register “btnPostbackTimeUpdate” as a postback control which will cause it to postback in the traditional manner even though it is in the update panel.
Please see Listing 2 for this code if you would like to copy and paste
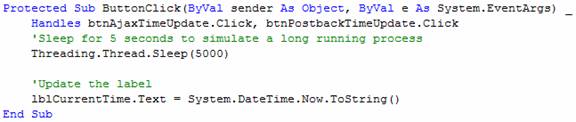
- Our next step is to create a method to respond to the clicking of the buttons in the front end. To accomplish this we will create a method called “ButtonClick” that responds to both of the buttons’ click events. In here we will have a simple 5 second delay then will update the label with the current time.
Please see listing 3 for this code if you would like to copy and paste
- Now to complete this example we will be adding a “CollapsiblePanel” control from the ASP.NET AJAX Control Toolkit. To get started with this we will need to add a reference to the toolkit within our DNN solution.
- Right click on your solution and select “Add Reference”
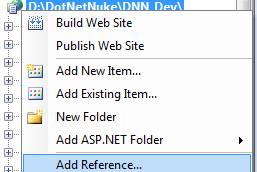
- In the selection dialog that appears browse to the install location of the ASP.NET AJAX toolkit. (This location varies) and add a reference to the AjaxControlToolkit.dll file
- Now in your “DemoControl.ascx” page you will want to add the following line as the second line of code, this registers the extender

- Now, below the panel we created above for the first example add the following code to declare the extender and the content which we will collapse
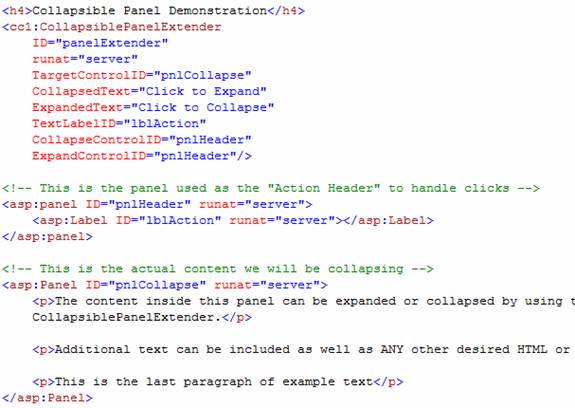
In this code we are simply creating our Extender which has the text to show for expanded and collapsed as well as setting the controls which should cause expand/collapse. We then have two additional controls which we use to handle the header display and then the actual collapsible content.
Please see listing 4 for the code listed above.
- This now completes the coding portion of our module, you can now continue on to the installation
Now that we have created the module as we desired we can now add the module definition to our DNN installation and test the module. Please follow the below steps to create the definition and add the module to a page.
- Login to your development DNN site as the host user.
- From the “Host” menu select “Module Definitions”
- At the bottom of this page select the “Create New Module” link
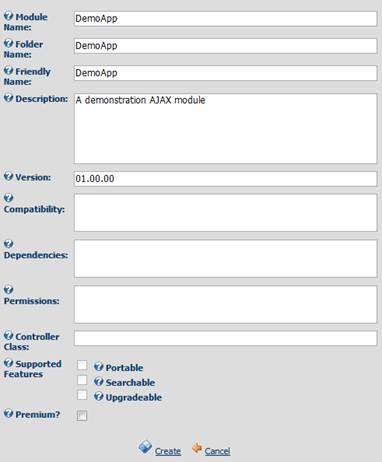
- Fill in the fields according to the below screen capture then press “Create” to create the module definition. This simply identifies the folder that we created initially as the container for a module.
- Now, in the “New Definition” section place the text “Demonstration Control” in the textbox and click the + sign

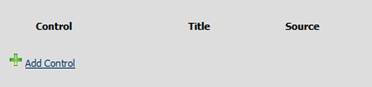
- Then after the page reloads you should be presented with an “Add Control” option, click this link to add a control
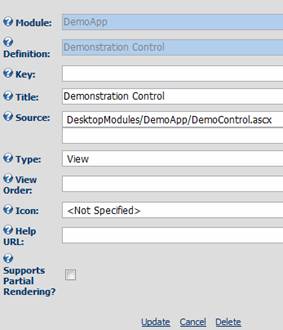
- In the window that appears you will want to enter a title for the Demo Control we created, and you will want to select the proper file from the “Source” listing. Ensure that “View” is selected for the type then click update
- Now navigate to the page you would like to place the module on
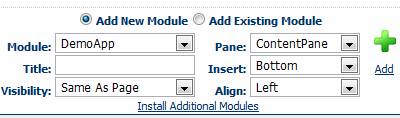
- From the control panel select the “DemoApp” module and click “Add” to add it to your page
- You should now see our demonstration module on the page
- If you click on the “Update (AJAX)” button you should notice a 5 second delay with a progress bar control below the control then the time will update without the page reloading.
- If you click on the “Update (Postback)” button you should notice that the time will be updated after the same 5 second period, however it does refresh the entire page
- If you click on the “Click to Collapse” text you should notice that the text does collapse and that the text changes to “Click to Expand”.
- If you click on “Click to Expand” you should notice that the text will re-appear and the text will change back to “Click to Expand”
Want to download the code? Just sign in to download.
Other code files: listing1.txt, listing2.txt, listing3.txt, listing4.txt or copy and paste the DotNetNuke AJAX Module code.
|
|
Number of views (9810)/Comments (-)
Tags:
blog comments powered by