This is a demonstration of the PGateway feature of Dynamic Forms. This feature allows for multiple modes of payment available for the user to choose from. In this demonstration, the choices are PayPal, credit card payment via Authorize.net. As a third option, we demonstrate how you can also offer users the option to mail a check payment.
This demonstration will also showcase the use of calculation to obtain totals, question events to display fields based on user response, and customizing your email completion events based on the payment mode selected. We will also discuss using the Advanced Wizard to define settings for multiple questions in one step.
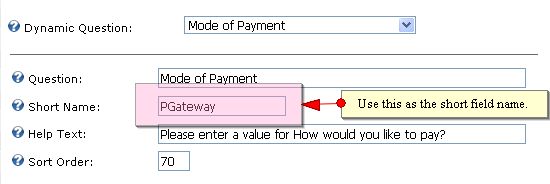
Setting PGateway
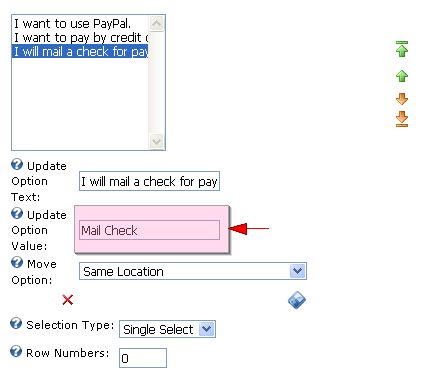
The key element here is the use of PGateway as the short field name for the question that offers the choices. As you can see in the image below, the question is "Mode of Payment" but the short field name is PGateway.
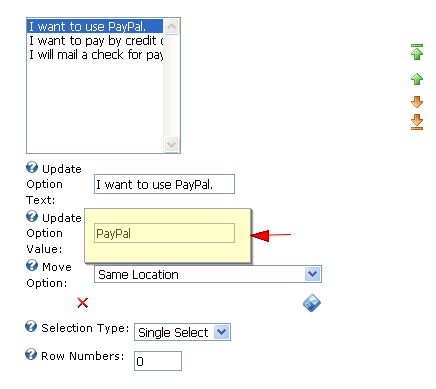
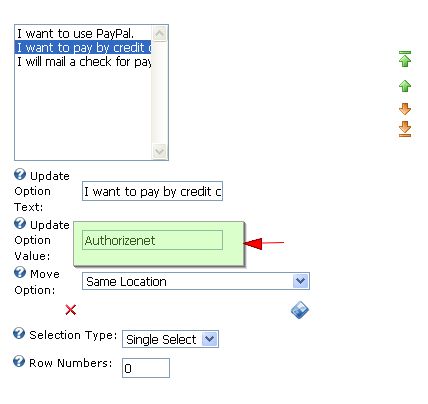
You can use any verbiage that best suits you to describe the payment options. However, the option value has to be either PayPal or Authorizenet as you can see in the images below:
Note that the option value below is Authorizenet and NOT Authorize.net (with no dot):
If you want to offer a "Check in the mail" option, you can use Mail Check as the option value, or any other descriptions you prefer.
Obtaining Totals
For our purposes, we created 2 fields that require the total amount. The first has a short field name of YourTotal and is a Text/HTML field that gives a more user-friendly approach but also prohibits the user from altering the total amount. The second total field is the $(Total) which is hidden and is what we use to pass data to the payment gateways.
Remember, though, that the client-side calculations are not set within the total fields. Instead, this is set in the field that offers the options, in this case, the Products checkbox list. Using this field, you will find the client-side box under Advanced Field Options as shown in the image below:
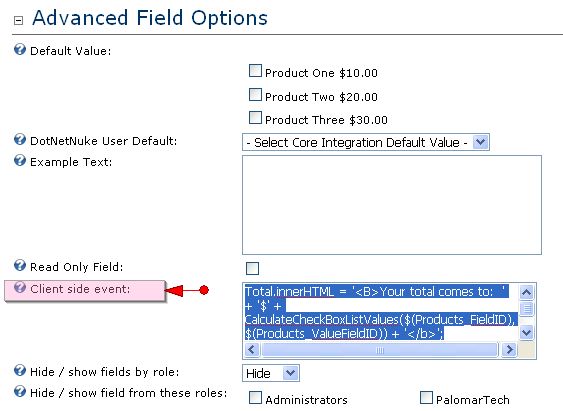
Here are the two calculations inserted in the Client side event above:
Total.innerHTML = '<B>Your total comes to: ' + '$' + CalculateCheckBoxListValues($(Products_FieldID), $(Products_ValueFieldID)) + '</b>';
$(Total) = CalculateCheckBoxListValues($(Products_FieldID), $(Products_ValueFieldID))
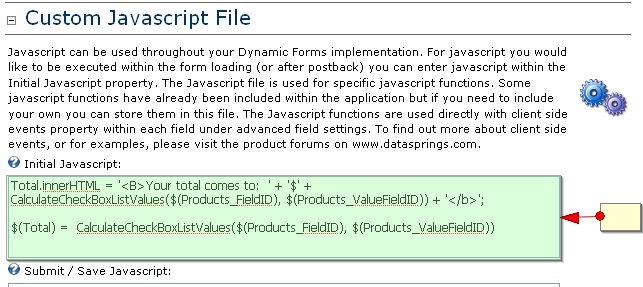
Note: There is an extra step to make the calculations work. In Module Configuration, Custom Javascript File, we need to add this to the Initial Javascript:
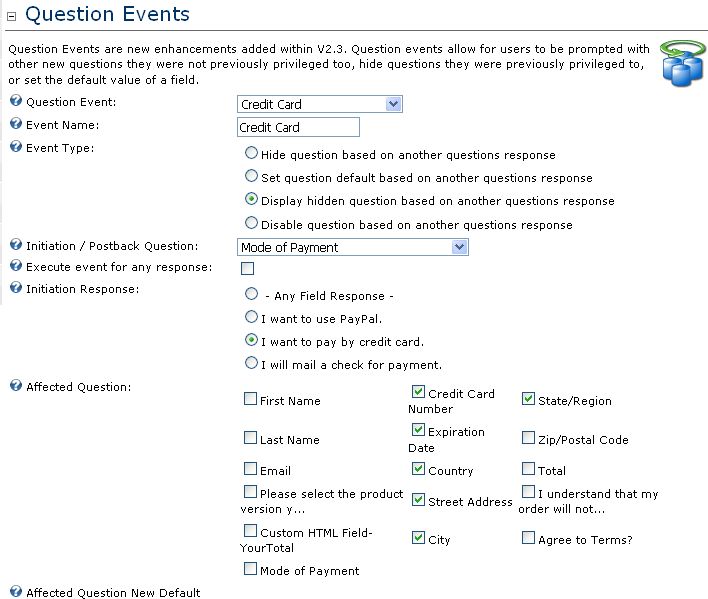
Creating Question Events
A Question Event is an event that occurs while the user is filling out the form BEFORE the submit button is hit. In this demonstration, questions like Credit Card, Expiration Date and address fields are initially hidden until the credit card payment mode is selected. These fields were set up with 'Hide until forced visible by question event.' You will find this setting when you Manage Question under Advanced Field Options.
After setting up these questions, it's time to set up your question event. In this case, we named the question event as Credit Card with the settings you find in this image:
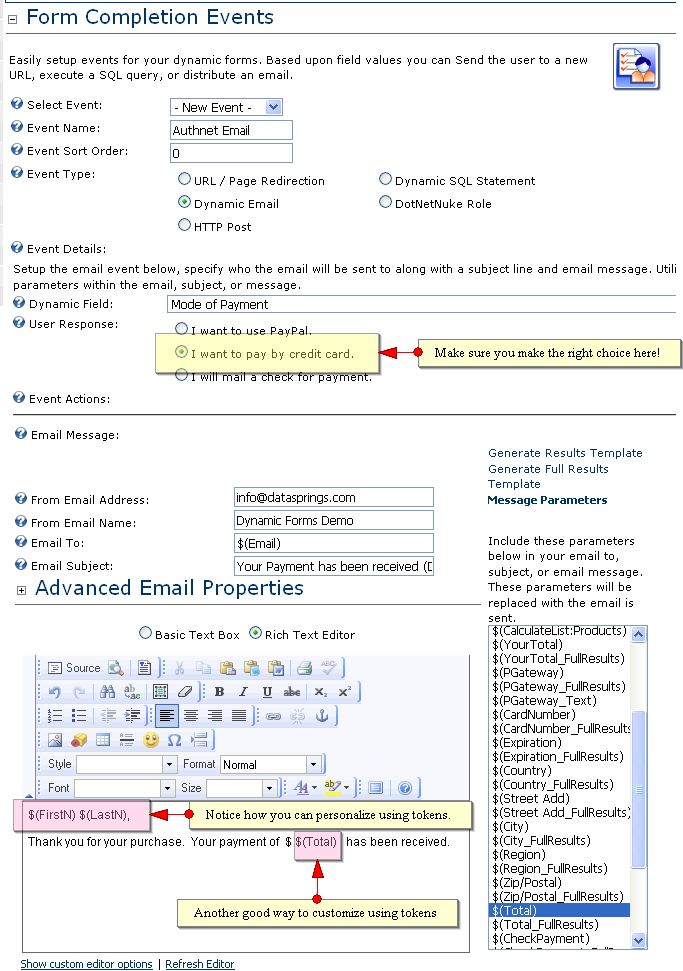
To create your email events, simply go to Completion Events,
Completion Events
A completion event is an event that occurs AFTER the user hits the submit button. The most important element in creating your completion events here is making the right choice when selecting the dynamic field and the user response that triggers the event. In the image below, we are creating an email event that will go off if the user chooses to pay by credit card.